Configure Okta SAML SSO
Set up SAML-based Single Sign-On with Okta for your organization.
Prerequisites
- Okta admin account
- Access to your Okta dashboard
Contact MintMCP
Email enterprise@mintmcp.com to request SAML setup. Include your company name and contact info.
We'll provide:
- ACS URL (Assertion Consumer Service URL)
- SP Entity ID (Service Provider Entity ID)
These values are unique to your organization and look like:
| Field | Example |
|---|---|
| ACS URL | https://auth.mintmcp.com/sso/saml/acs/n3Px8wlK2Ja6DCUz4GFtyVBQM |
| SP Entity ID | n3Px8wlK2Ja6DCUz4GFtyVBQM |
Create the Okta application
- Go to Applications → Applications in Okta admin
- Click Create App Integration

- Select SAML 2.0 and click Next
- Set App name to "MintMCP"
- Click Next
Configure SAML settings
Enter the values MintMCP provided:
| Field | Value |
|---|---|
| Single sign-on URL | ACS URL from MintMCP |
| Audience URI (SP Entity ID) | SP Entity ID from MintMCP |
You can leave everything else as is. Click Next.

Okta Support Survey
- Select This is an internal app that we have created
- Click Finish
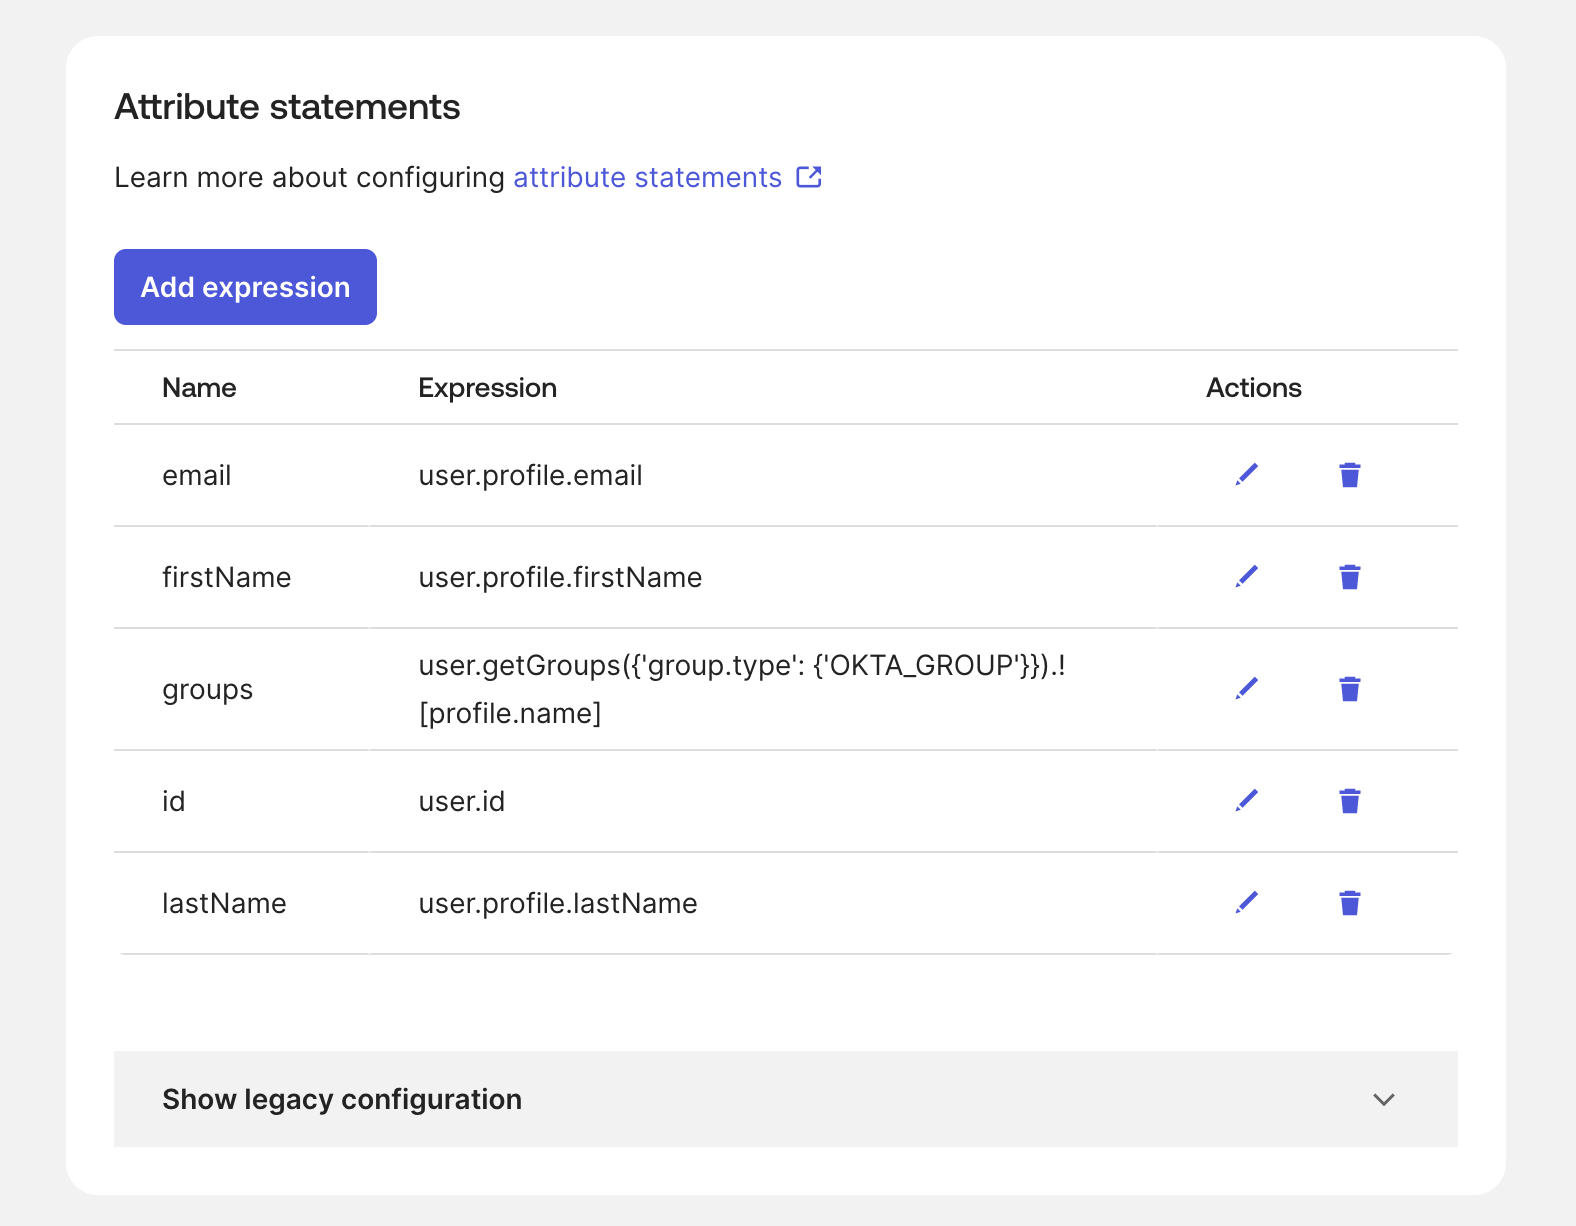
Sign On - Attribute statements
In the Sign On tab, go to the Attribute Statements section.
Click Add expression for each row below.
| Name | Expression |
|---|---|
id | user.id |
email | user.profile.email |
firstName | user.profile.firstName |
lastName | user.profile.lastName |
groups | user.getGroups({'group.type': {'OKTA_GROUP'}}).![profile.name] |
Send metadata to MintMCP
- Go to the Sign On tab in your Okta application, and then Settings
- Copy the Metadata URL from the SAML 2.0 section
- Send it to enterprise@mintmcp.com

In parallel: assign users
- Go to Assignments tab
- Click Assign → Assign to People or Assign to Groups
- Select users who need MintMCP access
Test
Once we confirm setup is complete:
- We'll send you a login link
- You should be redirected to Okta for authentication
- After login, verify your user info appears correctly in MintMCP
Troubleshooting
- Okta issues: See Okta's SAML documentation
- Other issues: Contact enterprise@mintmcp.com