Connect ChatGPT to MintMCP
Connect ChatGPT to MCP servers managed by MintMCP.
Prerequisites
- A ChatGPT Plus or Pro account
- A MintMCP account with access to at least one MCP server
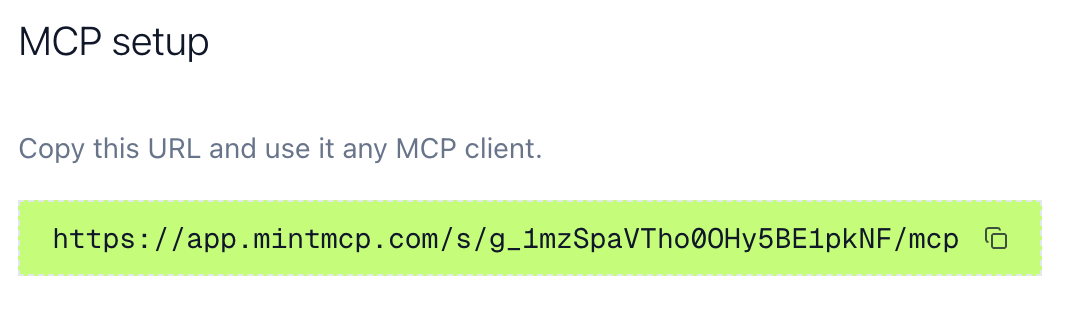
Get your MCP URL
- Go to MCP store in MintMCP
- Click the MCP server you want to connect
- Go to the MCP Client Setup tab
- Copy the MCP URL
Enable developer mode
- In ChatGPT, click your account icon (bottom left) → Settings → Connectors
- Scroll to Advanced settings
- Enable Developer mode

Add the connector
- Return to the Connectors page and click Create
- Configure:
- Name: A descriptive name (e.g., "Google Workspace")
- MCP URL: Paste your URL from MintMCP
- Authentication: Leave as "OAuth"
- Check I trust this application
- Click Create
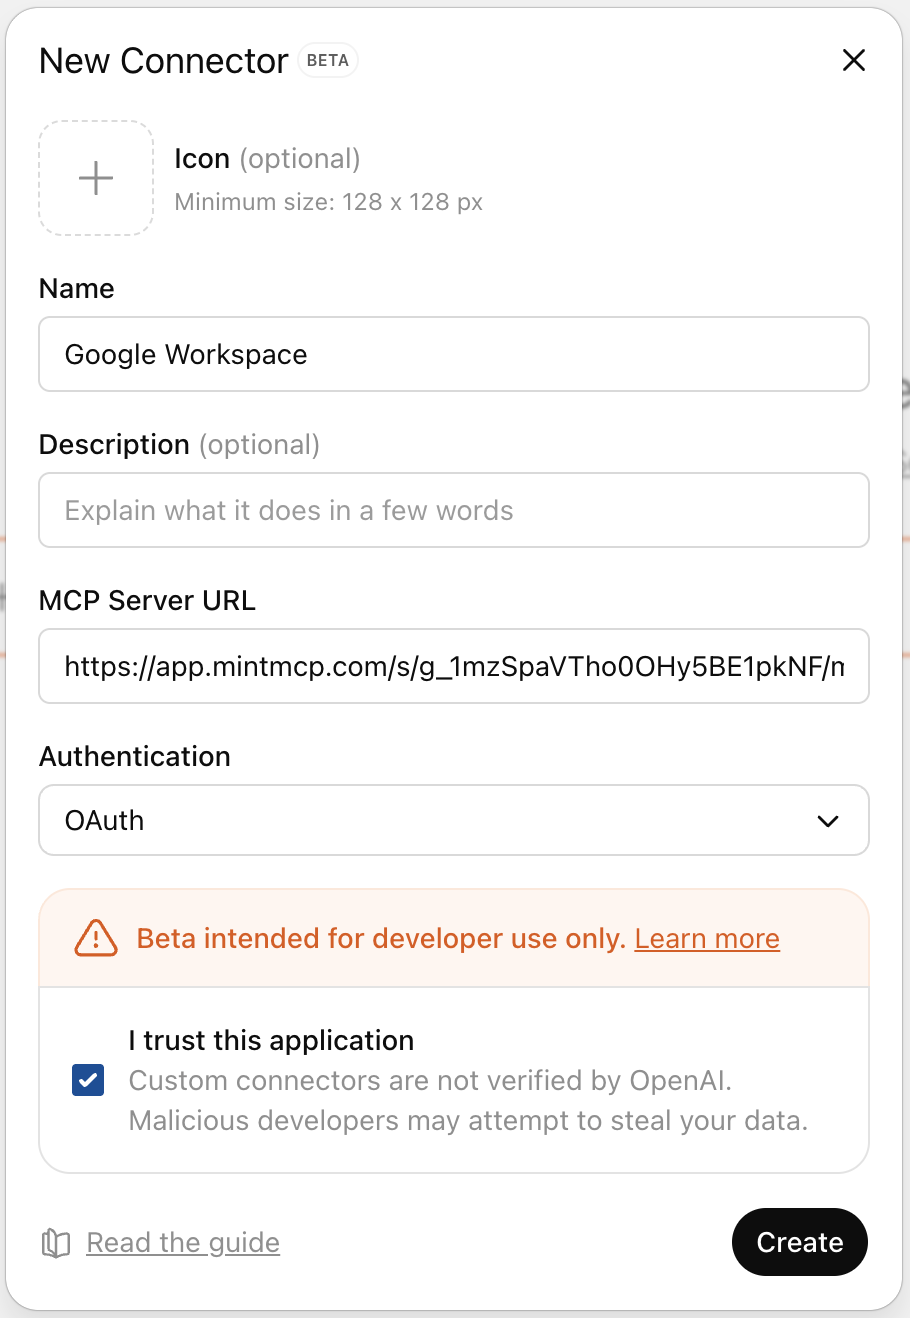
- Complete the MintMCP authentication when prompted
Verify the connection
- Start a new chat
- Click + in the chat, go to Settings, enable Developer Mode
- Select your MCP server

- Ask ChatGPT to use a tool from the server