Create a Custom GPT with MintMCP
Build a Custom GPT that connects to MCP servers through MintMCP.
Prerequisites
- ChatGPT Plus, Pro, Team, or Enterprise account
- A MintMCP account with access to at least one MCP server
Get your API details
- Go to MCP store in MintMCP
- Click the MCP server you want to use
- Go to the Custom GPT tab
- Choose your authentication method:
| Method | Best for |
|---|
| API Key | Personal use, simple setup |
| OAuth | Sharing with teammates, per-user attribution |
Create the Custom GPT
- Go to ChatGPT GPT Editor
- Configure the basics:
- Name: e.g., "Google Workspace Assistant"
- Description: What this GPT does
- Instructions: How to use the MCP tools
- In the GPT Builder, go to Configure
- Click Create new action
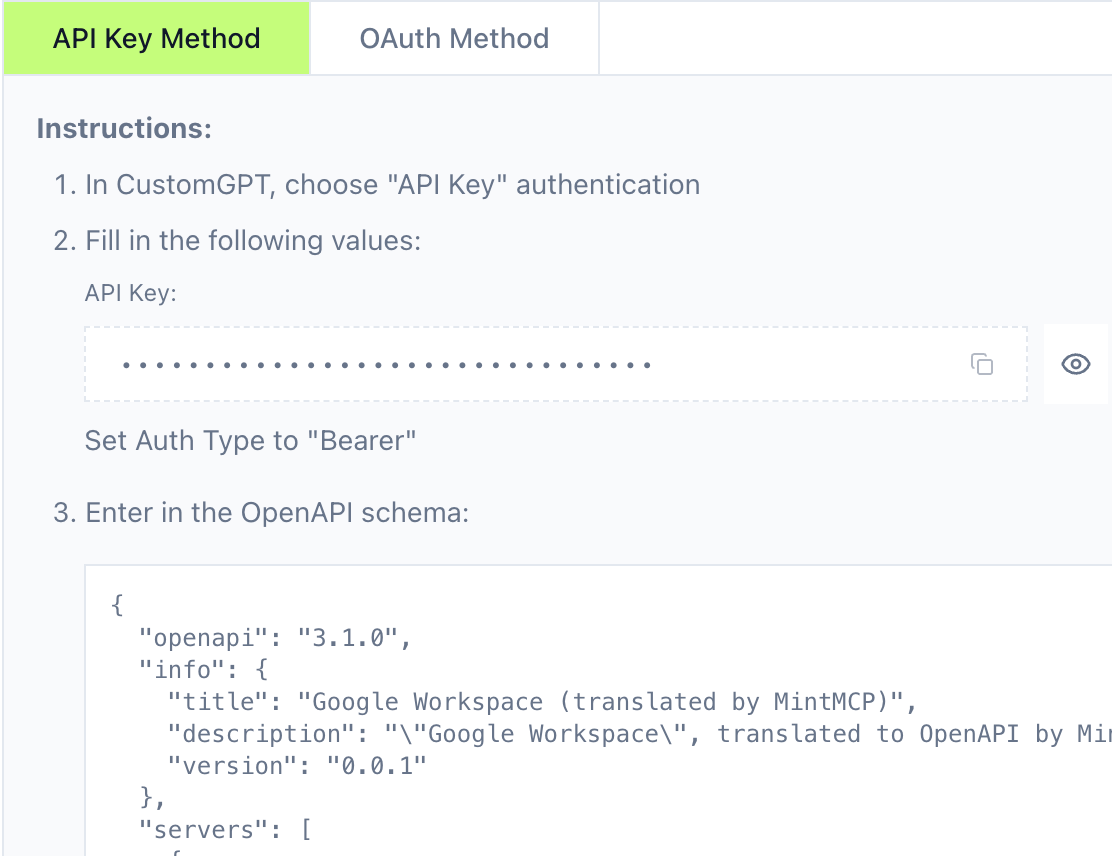
- Paste the OpenAPI schema from MintMCP
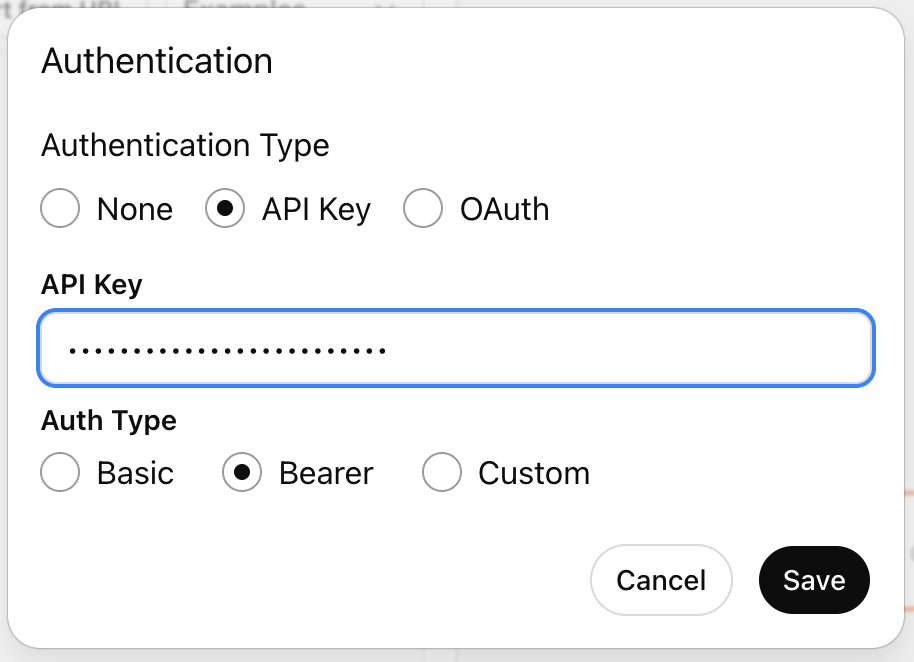
API key authentication
- Set Authentication Type to API Key
- Set Auth Type to Bearer
- Paste the API key from MintMCP
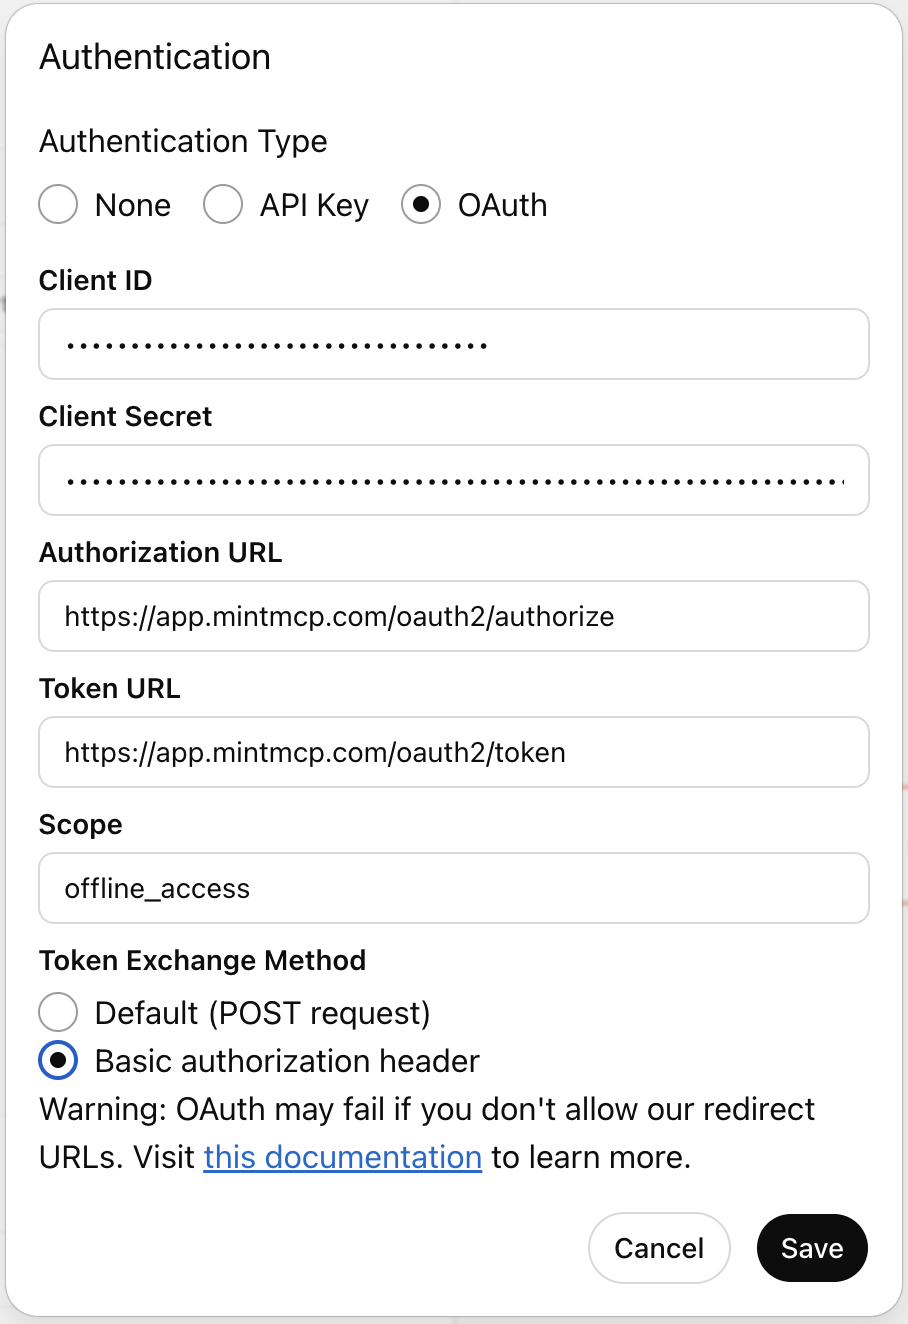
OAuth authentication
- Set Authentication Type to OAuth
- Copy these values from MintMCP:
- Client ID
- Client Secret
- Authorization URL
- Token URL
- Set Scope to
offline_access
- Set Token Exchange Method to Basic Authorization Header
- After saving, copy the Callback URL from ChatGPT
- Paste it in MintMCP's Custom GPT tab and click Submit
Test and publish
- Use the Preview panel to test your GPT
- Verify the tools work as expected
- Click Create and choose sharing settings:
| Account type | Sharing options |
|---|
| Team/Enterprise | Invite only, Organization, Public |
| Plus/Pro | Only me, Anyone with link, Public |
API key vs OAuth
| Choose API key when... | Choose OAuth when... |
|---|
| Personal use only | Sharing with teammates |
| Simple setup preferred | Need per-user attribution |
| All activity attributed to you is fine | Each user needs their own permissions |