Set up the Okta MCP server
The Okta MCP server gives AI agents access to your Okta organization — user lifecycle management, group membership, application provisioning, policy management, and system log retrieval. This guide covers creating an Okta API service app, generating a private key pair for headless authentication, granting API scopes, and adding the server to MintMCP.
Prerequisites
- A MintMCP admin account
- An Okta organization with super administrator access
Create an Okta API service app
The MintMCP connector authenticates to Okta using Private Key JWT — a headless flow that doesn't require browser interaction. This requires an API Services app in Okta (not a Native App).
-
Sign in to your Okta Admin Console.
-
Go to Applications > Applications.
-
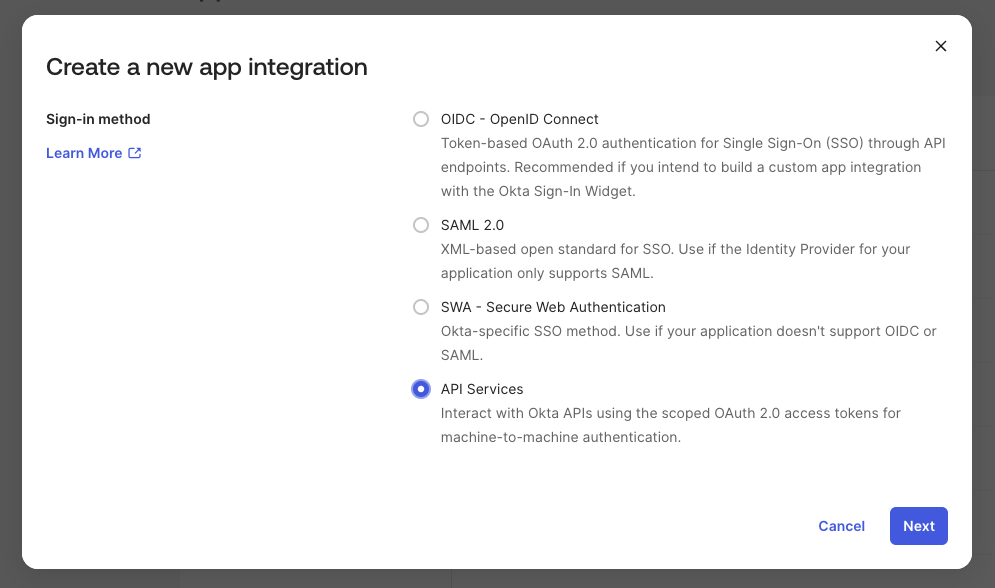
Click Create App Integration.
-
Select API Services and click Next.
-
Enter a name — for example,
MintMCP— and click Save.
Generate a key pair
-
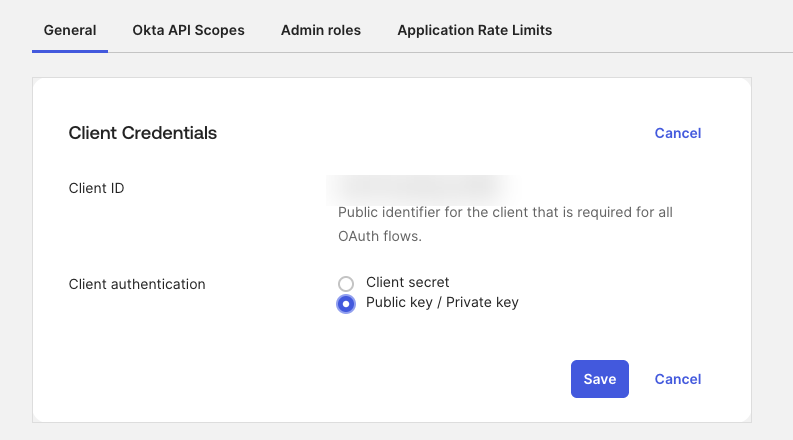
On your new app's General tab, find the Client Credentials section and click Edit.
-
Set Client authentication to Public key / Private key.
-
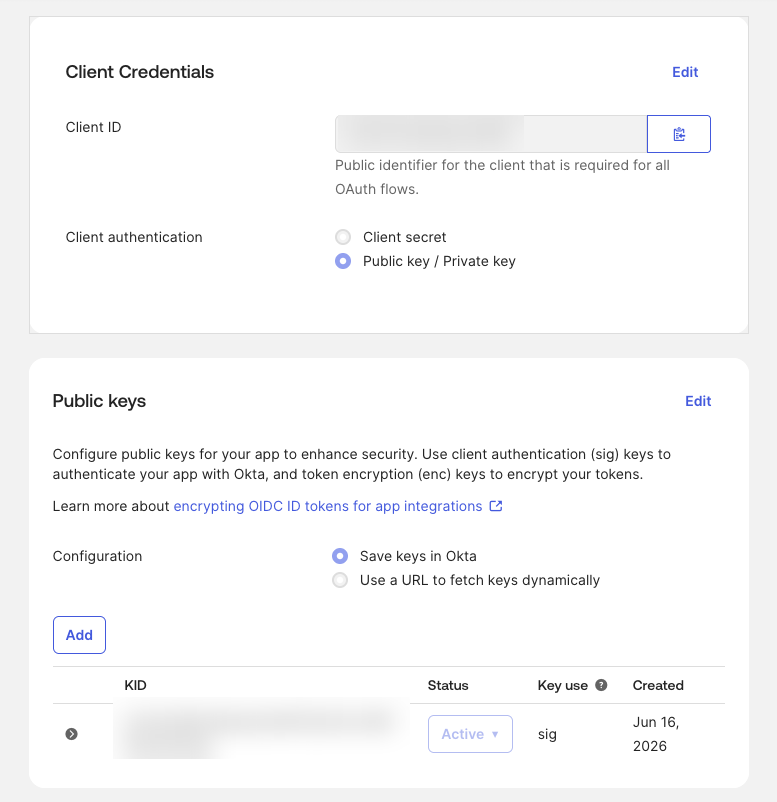
Under Public keys, click Edit, then select Save keys in Okta.
-
Click Add key → Generate new key.
-
Select PEM format, then click Copy to clipboard. Save the copied text — this is your private key (
OKTA_PRIVATE_KEY). Okta does not show this key again after you dismiss the dialog.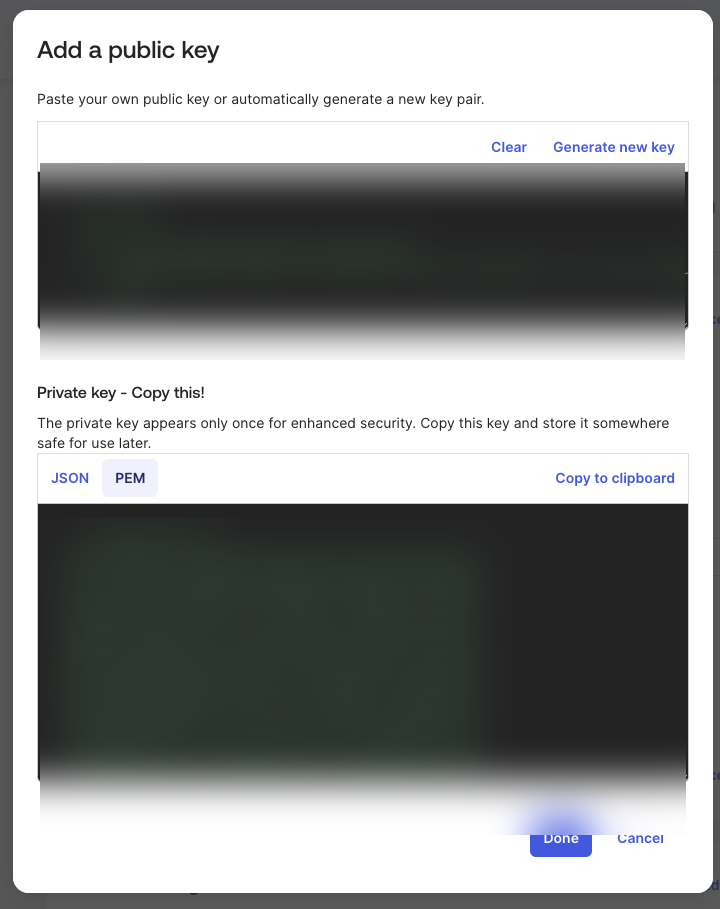
-
Click Done, then Save.
After saving, the Public keys section lists the new key as Active with a KID (Key ID). Copy this value — you'll enter it as OKTA_KEY_ID.
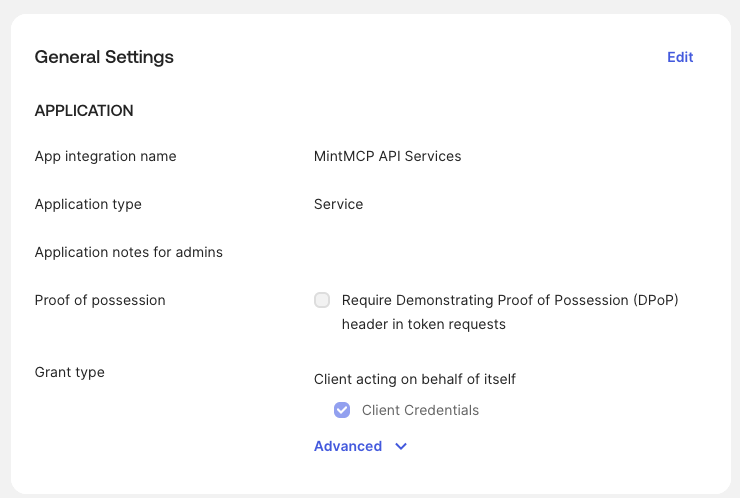
Disable DPoP
DPoP (Demonstrating Proof of Possession) is not compatible with headless service-app flows.
-
In General Settings, click Edit.
-
Uncheck Require Demonstrating Proof of Possession (DPoP) header in token requests.
-
Click Save.
Grant API scopes
-
Go to the Okta API Scopes tab on your app.
-
Click Grant for each scope your team needs.
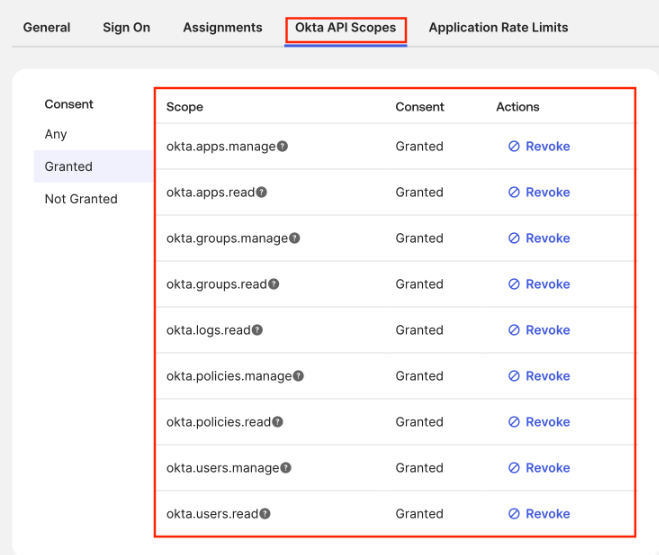
At minimum, grant okta.users.read and okta.groups.read. Expand based on what the connector needs to do:
| Scope | Capabilities granted |
|---|---|
okta.users.read | Read users and profile attributes |
okta.users.manage | Create, update, and deactivate users |
okta.groups.read | List groups and their memberships |
okta.groups.manage | Create, update, delete groups; manage group membership |
okta.apps.read | List and read application integrations |
okta.apps.manage | Create, update, activate, and delete applications |
okta.policies.read | Read sign-on, password, and MFA policies |
okta.policies.manage | Create, update, and delete policies and policy rules |
okta.logs.read | Read system log events |
okta.brands.read | Read brand themes and email templates |
okta.brands.manage | Modify brand themes, sign-in pages, and error pages |
okta.templates.read | Read email template customizations |
okta.templates.manage | Create and modify email customizations |
okta.deviceAssurance.read | Read device assurance policies |
okta.deviceAssurance.manage | Create and manage device assurance policies |
okta.domains.read | Read custom domains |
okta.domains.manage | Add, verify, and delete custom domains |
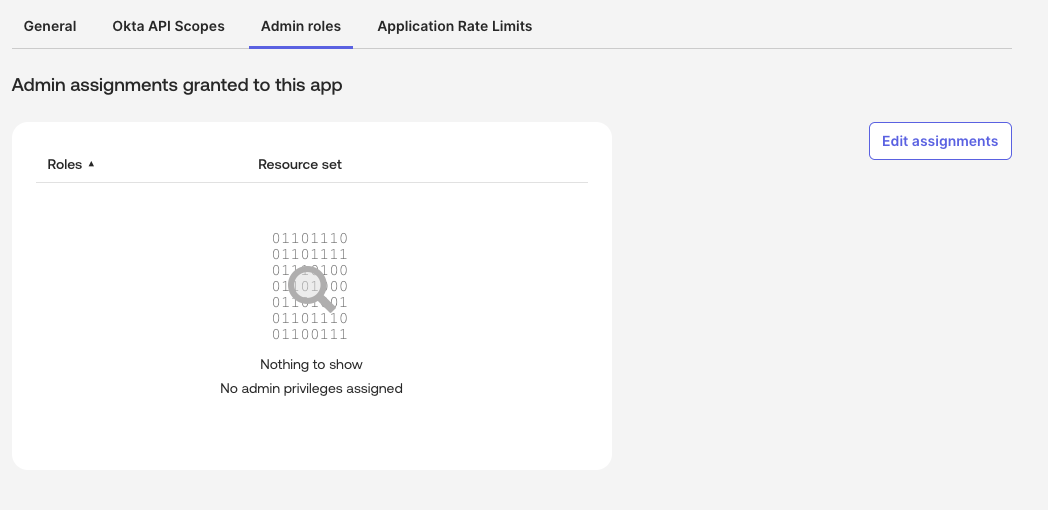
Grant an admin role
API scopes alone aren't enough — Okta also requires the service app to hold an admin role. Without one, read calls still succeed but return empty results (listing users comes back with nothing), and write calls fail with 403. Grant a role that matches the scopes you assigned.
-
Go to the Admin roles tab on your app. A new app shows No admin privileges assigned.
-
Click Edit assignments.
-
Under Role, select the role the connector needs:
Scopes granted Role to assign Read-only ( *.read)Read-only Administrator Read and write ( *.manage)Organization Administrator, or a scoped custom role if your Okta org supports it 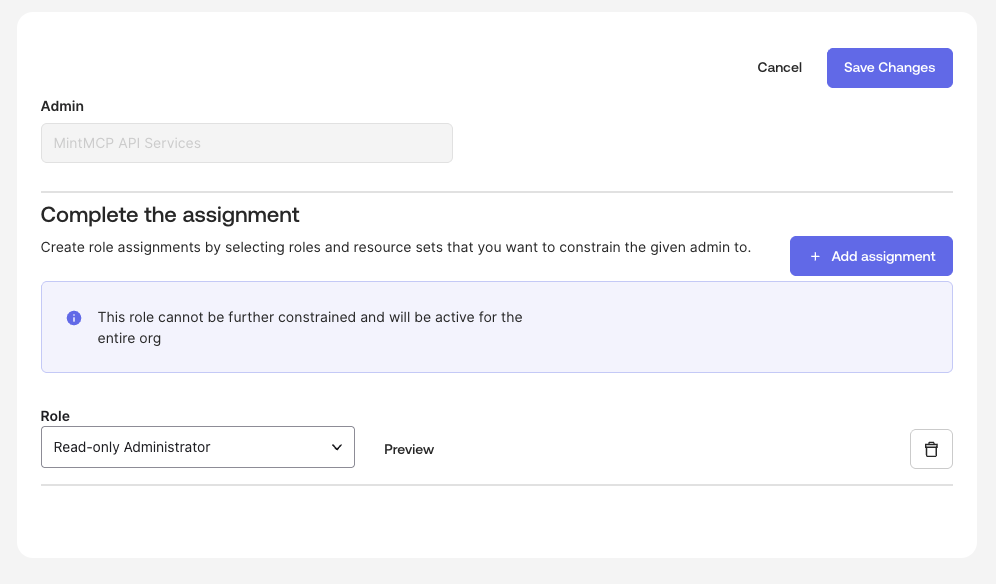
-
Click Add assignment if it isn't already added, then click Save changes.
Add the Okta MCP server to MintMCP
-
Find Okta in the list and click to install it.
-
Enter the following values in the setup dialog:
Field Value OKTA_ORG_URLYour Okta org URL — for example, https://acme.okta.comOKTA_CLIENT_IDClient ID from the app's General tab OKTA_PRIVATE_KEYThe full PEM private key, including the -----BEGIN PRIVATE KEY-----and-----END PRIVATE KEY-----linesOKTA_KEY_IDKey ID shown next to the public key on the General tab OKTA_SCOPESSpace-separated scopes — defaults to okta.users.read okta.groups.read -
Click Save.
Security considerations
- The private key grants API access to every Okta operation the service app is authorized for — treat it like a password and do not store it outside MintMCP.
- All MintMCP users share the same service app connection, so actions are performed as the service app rather than as individual Okta users. Scope the permissions accordingly.
- Grant only the scopes your team actually needs — avoid
managescopes unless write access is required. - If the private key is compromised, generate a new key pair in Okta, update the MintMCP connector, then delete the old public key from the service app.
Troubleshooting
invalid_clienton token requests — the Key ID or private key doesn't match the public key saved in Okta. ConfirmOKTA_KEY_IDmatches the Key ID shown next to the public key, and thatOKTA_PRIVATE_KEYis the full PEM including the header and footer lines.invalid_dpop_proofor DPoP-related errors — DPoP is still enabled on the app. Uncheck Require Demonstrating Proof of Possession (DPoP) header in token requests under General Settings.- Empty results from read calls (e.g. listing users returns nothing) — the scope is granted but the app has no admin role. Reads return empty instead of erroring. Assign Read-only Administrator on the Admin roles tab.
- 403 on write operations — the app has read access but no role that allows writes. Assign Organization Administrator (or a scoped custom role) for
managescopes. invalid_scope— a scope inOKTA_SCOPEShasn't been granted on the Okta API Scopes tab. Grant it, or remove it from the connector config.
Next steps
- Tool customization — Control which Okta tools are exposed to users
- MCP gateway administration — Manage access and permissions